Project Align
CommandProject Align
Shortcut—
Button In Command Palette
In Command PaletteAvailable in
IndieStudio
Description
Project Align aligns the edge of a target surface to a reference surface along a specified projection direction, with real-time updates constrained to that direction. Options let you choose the solver, continuity, and projection method, and a reference curve can optionally drive the alignment.
The target surface must be untrimmed and consist of a single surface patch. If it is trimmed or has multiple patches, the command will not work as expected.
Basic Usage
- Type Project Align in the Command Palette and execute it.
- The command will prompt you to select the target edge to align, then select the reference surface to align to.
- Optionally, select a reference curve to guide the alignment of the target surface.
- Specify the direction of projection with the Gizmo handles.
- Specify the options in the Command Dialog.
-
Command Dialog
- Solver: Select the solver to use for aligning surfaces.
- XNurbs: Uses the xNURBS solver to align surfaces. This is the default option. It's generally the most accurate, but requires a reference curve to drive the alignment. (Studio License required)
- Constrained: Uses a constrained solver to align surfaces. This option is faster, but may not produce results as accurate as the xNURBS solver, and does not require a reference curve.
- Note: A small icon will appear near the alignment handle indicating the type of command operation and the continuity being used. You can edit the constraint by double-clicking on the icon to change the continuity type -
 /
/  /
/  .
.
- Note: A small icon will appear near the alignment handle indicating the type of command operation and the continuity being used. You can edit the constraint by double-clicking on the icon to change the continuity type -
- Continuity: Specify the continuity of the Surface.
- G0: Position continuity.
- G1: Tangent continuity.
- G2: Curvature continuity.
- Perpendicular: Aligns the surface to be perpendicular to the reference surface. First row of CVs will be perpendicularly upward to the reference surface, while the rest of the surface will be adjusted to maintain smoothness.
- Blend extra rows: Controls how the new surface blends at its start and end.
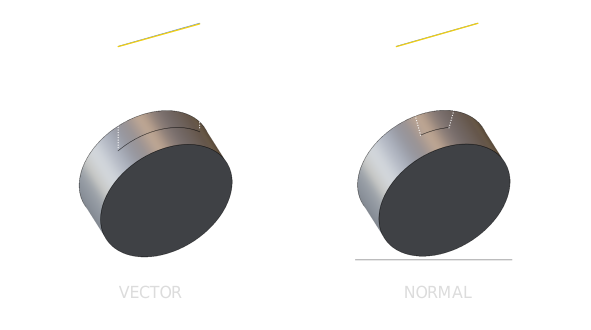
- Projection: Select the projection method to use.
- Normal: Projects the target surface along its normal direction.
- Vector: Projects the target surface along a specified vector direction.
- Solver: Select the solver to use for aligning surfaces.
-
Command Dialog
- Confirm with OK in the Command Dialog or right-click.